
How Long Does It Take to Paint Kitchen Cabinets? A Day-by-Day Timeline
· By Fernando Maciel
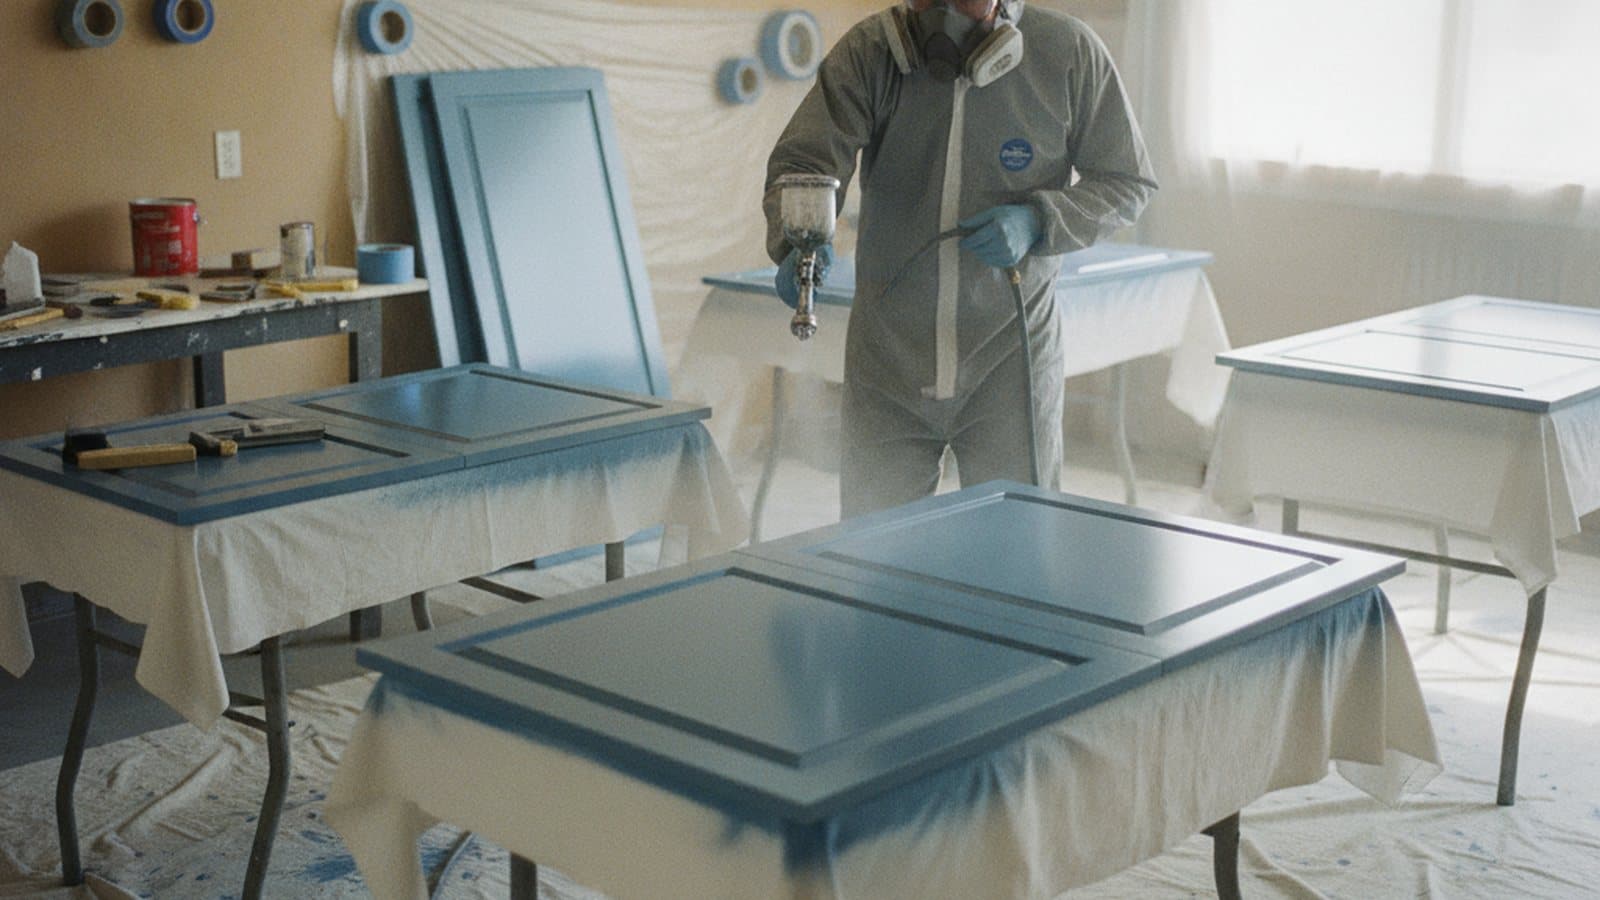
If you are planning to refinish your kitchen cabinets, the question that comes right after what will it cost is almost always how long will my kitchen be out of commission? It is a fair thing to ask, because a cabinet job is not a one-day paint-and-go project. Done properly, it is a multi-step process with real dry and cure time built in, and that timeline is exactly what separates a finish that lasts from one that chips at the handles within months.
This guide lays out a realistic day-by-day timeline for painting kitchen cabinets, explains the difference between dry time and cure time (the part most people miss), and walks through what makes a project shorter or longer. It also covers whether you can keep using the kitchen while the work happens, so you can plan around it without surprises.
The short answer: most cabinet jobs run several days
For a typical kitchen, painting or refinishing the cabinets usually takes somewhere in the range of three to five working days on site, and sometimes a bit more. That covers removing the doors and hardware, cleaning and prepping every surface, priming, and spraying the finish coats with the right dry time in between. It is not a project that gets done well in an afternoon, and any crew promising a same-day turnaround on a full kitchen is skipping steps that matter.
The reason it takes days rather than hours is that a durable cabinet finish is built in thin layers, and each layer needs time to dry before the next one goes on. Rush that and the coats never bond properly, which is the number one cause of a painted cabinet that peels or chips early. The on-site timeline is only part of the story, though, because the finish keeps hardening for weeks after the crew leaves, which is where the difference between dry time and cure time comes in.
Keep in mind these are market-typical patterns, not a fixed schedule. Every kitchen is different, and the actual timeline depends on how many doors and drawers you have, the material of the cabinets, whether you are making a big color change, and how much repair the boxes need first. An in-home look is the only way to pin down a real timeline for your specific kitchen.
Day 1: Remove doors and hardware, label everything, and mask off
The first day is all setup, and it matters more than it looks. Every cabinet door, drawer front, hinge, knob, and pull comes off, and each piece gets labeled so it goes back in exactly the same spot when the job is done. This step is skipped by rushed jobs, and it is a big reason their results look sloppy. Painting doors while they hang on the hinges leaves drips, misses the edges, and traps the hardware under paint.
With the doors off, the crew masks and protects the kitchen: covering countertops, appliances, floors, and backsplash, and sealing off the workspace so overspray and dust stay contained. The cabinet boxes that stay on the wall get taped off around the openings so the sprayed finish only lands where it should.
The doors and drawer fronts are then moved to a controlled work area, often a garage or a dedicated space with good ventilation, where they can be sprayed flat and left to dry undisturbed. Finishing them off the cabinet is what gives that smooth, even, factory-like look instead of the brush texture you get from painting them in place.
Day 1 to 2: Clean, degrease, sand, and repair
This is the least glamorous part of the job and the single most important one. Kitchen cabinets carry years of cooking grease and oils that you often cannot even see, and paint will not bond to a greasy surface no matter how good the product is. Every door, drawer, and box face gets thoroughly cleaned and degreased first, because skipping this step is the most common reason a painted cabinet fails.
After degreasing comes sanding. The existing finish is scuff-sanded so the primer has something to grip, and any glossy factory coating is dulled down. Dents, chips, or worn edges get filled and sanded smooth, and on wood cabinets the open grain may be addressed if you want a glass-smooth result. Everything is then wiped clean of sanding dust, because dust trapped under primer shows up as a gritty, uneven finish.
If the cabinet boxes have any damage, this is when it gets handled. Loose joints, water-swollen spots, or worn areas near the sink and dishwasher are addressed before any coating goes on. Repairs add time, but they are what keep the finished cabinets looking right, and it is far cheaper to fix them now than to work around them later.
Day 2 to 3: Prime, then spray the finish coats with dry time between
With prep done, a quality bonding primer goes down. Primer is what locks the new finish to the cabinet and blocks stains or wood tannins from bleeding through, and it is non-negotiable on a job you want to last. The primer is sprayed on the doors and drawer fronts in the work area and on the boxes in the kitchen, then left to dry and lightly sanded again for a smooth base.
Next come the finish coats. A cabinet-grade coating is sprayed rather than brushed so it lays down even, with no brush marks or roller stipple, and it is applied in thin, controlled coats. Most jobs need two finish coats, sometimes more for a dramatic color change, with proper dry time between each one so they bond correctly. This is the step that cannot be rushed, and it is why the schedule spreads across a few days rather than getting crammed into one.
The doors and drawer fronts stay in the controlled work area through this whole stage, drying flat and untouched so nothing settles into the wet finish. The boxes cure in place in the kitchen. Everything sits protected until the coating is dry enough to handle for reinstallation, which is a different thing from being fully cured.
The final day: Reinstall doors, drawers, and hardware
Once the finish coats have dried enough to handle safely, the doors and drawer fronts come back to the kitchen and get reinstalled. Because everything was labeled on day one, each piece returns to its original opening, and the hinges are adjusted so the doors sit even and close cleanly. New or original knobs and pulls go back on, and the masking comes off.
This is also a quality-check moment. The crew looks over every door and edge in the kitchen light, touches up anything that needs it, and makes sure the reveals between doors are consistent. A good reinstall is what makes the finished job read like new cabinetry rather than a repaint.
It is worth knowing that the cabinets look completely finished at this point, but the coating is not at full hardness yet. That is where the difference between dry time and cure time becomes the most important thing to understand about the whole project.
Dry time vs. cure time: why the finish keeps hardening for weeks
Dry time and cure time are not the same thing, and confusing them is what ruins otherwise good cabinet jobs. Dry means the coating is no longer wet to the touch and can be lightly handled or recoated, which happens within hours. Cure means the finish has fully hardened and reached its final durability, and that takes far longer, often a couple of weeks or more depending on the product and conditions.
In practical terms, your cabinets are usable soon after reinstall, but they are still soft while they cure. During that window it pays to treat them gently: close doors and drawers carefully rather than letting them slam, avoid stacking heavy items against fresh surfaces, wait before putting felt pads or bumpers back on, and hold off on scrubbing the finish. Being rough with cabinets in the first couple of weeks can leave marks that would never happen once the coating is fully cured.
This is also why rushing the job during application is so damaging. If finish coats are stacked before each one has dried, or the cabinets are put back into heavy use before the coating cures, the finish stays soft, bonds poorly, and starts failing at the high-contact spots first: around the handles, along the drawer edges, and near the sink. The patience built into a proper timeline is exactly what buys you years of durability.
Can you use your kitchen during the job?
Mostly, yes, with some real limits. Because cabinet refinishing keeps the boxes in place and works on the doors elsewhere, your kitchen is not gutted the way it would be in a remodel. You can generally still reach the sink and the inside of the cabinets during much of the project, which is a big advantage over tearing everything out.
That said, there are stretches where the kitchen is off limits. While the boxes are being sprayed and while the finish is drying, you need to stay out of the work zone so nothing lands in the wet coating and no dust gets stirred up. There is also fresh-paint odor to consider, so good ventilation matters, and it is smart to plan simple meals or eat out on the heaviest work days.
The practical move is to clear the counters and empty the lower cabinets before the crew arrives, set up a small temporary station somewhere else in the house with a microwave and coffee maker, and treat the spray-and-dry days as the ones where the kitchen is genuinely unavailable. Plan around those and the rest of the project is easier to live with than most people expect.
What makes a cabinet project take longer
The biggest driver is simply the number of doors and drawers. A compact kitchen with a dozen doors moves quickly, while a large kitchen with an island, a pantry, and forty-plus doors and drawer fronts has far more surface to prep, prime, spray, and reinstall, which stretches the timeline. Every piece has to be handled individually, so the count matters more than the square footage of the room.
Material makes a difference too. Solid wood and MDF cabinets take finish predictably, while slick laminate or thermofoil needs extra care and the right bonding products to get a coating to stick, which adds prep time. A dramatic color change, especially going from a dark stain to a light color, often needs an extra coat and more careful coverage, which adds a day. Detailed door styles with lots of grooves and profiles also take longer to spray evenly than flat, simple doors.
Finally, repairs and condition move the timeline. Cabinets with water damage near the sink, worn edges, loose joints, or old finishes that are peeling need more prep work before painting can start. Humidity plays a role as well, since damp conditions slow dry and cure times, and a Georgia summer kitchen can take a little longer between coats than a dry, climate-controlled space. None of this is a problem, it just needs to be built into the schedule honestly rather than rushed.
How to plan around a cabinet refinishing project
The best way to plan is to get an accurate, itemized estimate up front that spells out the timeline for your specific kitchen, not a generic number. Point out any damage, loose doors, water stains, or repairs you already know about, and mention if you are making a big color change, because those details are what shift the schedule. A walk-through where someone can count the doors and check the boxes gives you a timeline you can actually build around.
Then prep your side of it. Empty the cabinets and clear the counters before the start date, arrange a temporary spot for the coffee maker and microwave, and block off the heavy spray-and-dry days for simpler meals. If you are timing this around a holiday, a party, or a home sale, build in the cure window too, so you are not putting soft, freshly finished cabinets under heavy use the day after the crew leaves.
For homeowners across Marietta, Roswell, and the greater Atlanta area, a cabinet refinishing project is one of the highest-impact updates you can make to a kitchen, and it is very livable when the timeline is planned honestly. Maciel Painting can walk your kitchen, count the doors, flag any repairs, and give you a clear day-by-day schedule so you know exactly what to expect from start to fully cured.
Frequently asked questions
- How long does it take to paint kitchen cabinets?
- For a typical kitchen, painting or refinishing cabinets usually takes about three to five working days on site, covering removal, cleaning and degreasing, sanding, priming, and spraying the finish coats with dry time between them. Larger kitchens with more doors, laminate surfaces, big color changes, or repairs can take longer. The finish then keeps curing to full hardness for a couple of weeks after the crew leaves.
- What is the difference between dry time and cure time?
- Dry time is how long until the coating is no longer wet and can be handled or recoated, usually a matter of hours. Cure time is how long until the finish reaches full hardness and durability, which often takes a couple of weeks. Your cabinets are usable soon after reinstall, but you should treat them gently while they finish curing.
- Can I use my kitchen while the cabinets are being painted?
- Mostly, yes. Because the boxes stay in place and the doors are finished elsewhere, you can usually reach the sink and cabinet interiors for much of the project. The exception is while the boxes are being sprayed and drying, when you need to stay out of the work zone. Planning simple meals for the heaviest work days makes it easy to live with.
- Why does rushing a cabinet job ruin the finish?
- A durable cabinet finish is built in thin layers that each need time to dry and bond, and the coating keeps hardening for weeks after. If coats are stacked too fast or the cabinets go back into heavy use before curing, the finish stays soft and starts failing at the handles, drawer edges, and near the sink. The patience built into a proper timeline is what gives you years of durability.
- What makes a cabinet project take longer than expected?
- The number of doors and drawers is the biggest factor, followed by the cabinet material, whether you are making a dramatic color change, and how much repair the boxes need. Laminate surfaces, detailed door profiles, dark-to-light color changes, water damage near the sink, and high humidity all add time. An in-home look is the only way to get a timeline built around your specific kitchen.
Related services
Serving
Ready for an exact price?
Get a free, no-pressure in-home estimate. Real numbers for your home, not a phone guess.