
How to Prepare Your Home for an Interior Painting Project
· By Fernando Maciel
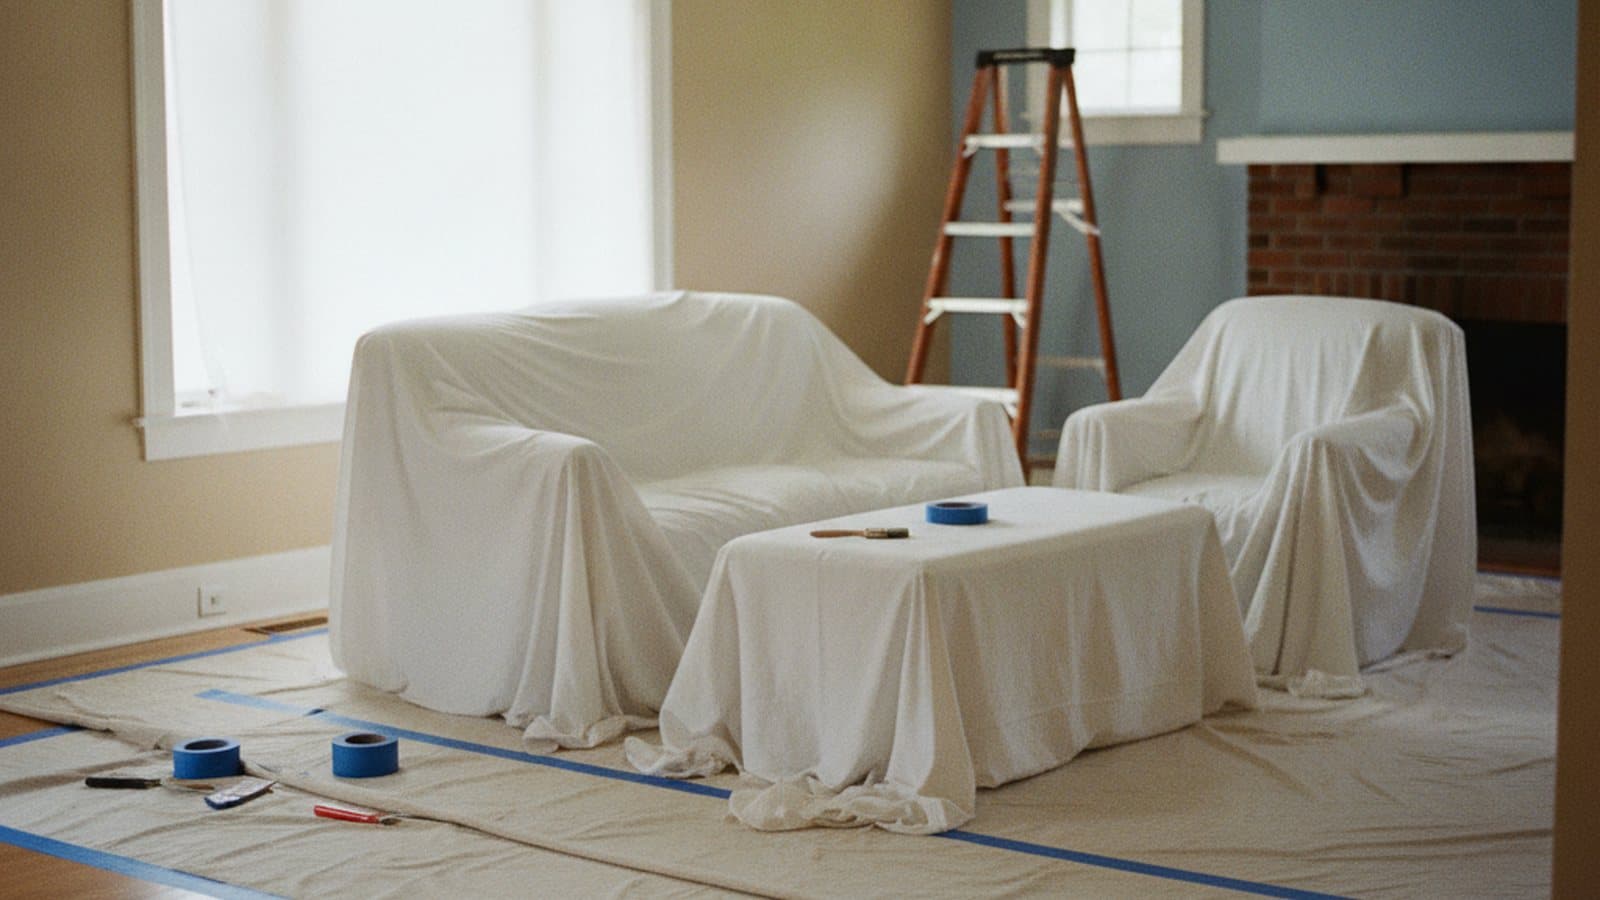
A smooth interior painting project starts before the first drop cloth goes down. When a room is cleared, the surfaces are ready, and everyone knows what to expect on day one, the crew moves faster, the finish comes out cleaner, and there are fewer surprises for you. A little prep on your end and a lot of prep on the pros end is what separates a stressful week from an easy one.
This guide breaks down exactly who does what. It covers the handful of things you should handle before the painters arrive, what the crew moves, covers, and protects, how to plan for pets, kids, parking, and access, and the real prep work a good painter does to make the paint last. By the end you will have a simple checklist you can run through the night before.
What you should do before the crew arrives
Your job the day before is mostly about small, personal, and breakable items. Clear off shelves, mantels, windowsills, and countertops in the rooms being painted, and take down photos, wall art, mirrors, and anything hanging on the walls. Painters will move furniture and cover big pieces, but loose knickknacks, electronics, lamps, and collectibles are safest when you box them up and set them aside yourself.
Pay special attention to valuables and anything irreplaceable. Jewelry, important documents, heirlooms, and small electronics should go somewhere completely out of the work zone, ideally in a room that is not being painted. This is not about trust; it is about keeping fragile and precious things far away from ladders, drop cloths, and a busy work area.
Finally, give the crew a clear path. Unplug and gather small electronics, coil up cords, and let the painters know if any outlets, switches, or fixtures need special attention. If you can strip beds and remove curtains and blinds in advance, that clears the walls and windows even faster. The less loose stuff in the room, the sooner the painting actually starts.
What the painters move, cover, and protect
A professional crew handles the heavy lifting, literally. Large furniture like sofas, beds, dressers, and tables gets moved to the center of the room or out of it entirely, then wrapped in plastic or covered with drop cloths so nothing catches a stray drip. You are not expected to haul a couch across the house before they show up; that is part of the job.
Floors get full protection. Painters lay down drop cloths, rosin paper, or plastic sheeting over hardwood, tile, and carpet, taping it down at the edges so it stays put through the whole project. Baseboards, built-ins, and anything staying in the room get masked off with painters tape and film so the lines stay crisp and the surfaces underneath stay clean.
It is still smart to talk through the plan up front. Point out any delicate flooring, a piece of furniture that cannot be moved, or a fixture you are worried about, so the crew can protect it the way you want. A good painter would rather over-communicate about protection than leave you guessing, and a quick walk-through on the first morning clears that up in minutes.
Planning for pets, kids, and daily routine
Pets and fresh paint do not mix. Wet paint, open cans, ladders, propped-open doors, and unfamiliar people coming in and out are all stressful or risky for animals. The easiest plan is to set up pets in a room that is not being worked on, put them in a crate away from the action, or arrange for them to stay with a friend or at daycare on the busiest days. Let the crew know a pet is in the home so no one accidentally lets it slip outside.
Kids need a plan too. Fresh paint, tools, and trip hazards from taped-down floor covering all mean the work zone is off-limits while the crew is active. Setting up a play area or activities well away from the rooms being painted keeps everyone safe and lets the painters focus. If a nursery or a child bedroom is on the list, ask about low-odor products and timing so the room airs out well before bedtime.
Think through your own routine as well. If the kitchen or a main bathroom is being painted, plan around not having full use of it for a day or two. Knowing which rooms are in play on which days lets you keep the parts of your home you need most fully usable while the project moves through the house.
Access, parking, and keeping the job moving
Painters work faster when they can get in and get set up without friction. On the first morning, make sure there is a clear way in for the crew and their equipment, and a spot to park close to the house for loading and unloading ladders, drop cloths, and materials. In a driveway or a tighter street around the Marietta area, moving your own cars out of the way the night before saves everyone time.
Decide up front how the crew will get in each day, especially if you will not be home. Whether that is a key, a garage code, a lockbox, or someone letting them in, settling it in advance keeps the project on schedule instead of stalling on the doorstep. Point out which entrance you would like them to use and where they can set up a staging area for tools and paint.
A few practical notes help too. Make sure the rooms have working light and that the crew can reach the electrical panel if a breaker needs resetting for lighting or equipment. Clearing the path from the door to the work area, and keeping that path clear each day, lets the crew carry materials in and out without weaving around obstacles.
The prep the pros do: patch, sand, caulk, prime
The reason a professional finish looks the way it does is almost entirely about what happens before any color goes on. A good crew starts by cleaning the surfaces and then filling nail holes, dents, and cracks with the right compound, letting each fill dry, and sanding it flat so the wall is smooth and even. Skipping this step is the number one reason a fresh coat still shows every flaw underneath.
Caulking is the next quiet difference-maker. Gaps where trim meets the wall, around door and window casings, and along baseboards get filled with a paintable caulk so the finished lines look tight and seamless rather than shadowed and dated. On any bare, patched, or stained areas, the crew spot-primes or fully primes so the new paint bonds properly and covers evenly, with no dull spots or stains bleeding through.
This prep is also where drywall repair folds in naturally. If a room has popped nails, a settling crack over a doorway, or an old water stain, handling it as part of the painting project means the repair gets patched, sanded, textured to match, and primed so it disappears under the finish coat. Pointing out those trouble spots before the work starts gets them scoped into the plan instead of painted over.
Color and sample decisions to lock in before day one
The best time to finalize your colors is before the crew arrives, not while they are standing in the room waiting. Paint colors shift dramatically with lighting, the size of the room, and the finishes already in the space, so a color that looked perfect on a tiny chip in the store can read completely different on a full wall in your home.
Test before you commit. Put large samples on the actual walls, in the rooms being painted, and look at them at different times of day, since Georgia daylight through a west-facing window can pull a color noticeably warmer by late afternoon. Living with the samples for a day or two prevents the most common regret, which is a color that looked right on paper and wrong on the wall.
Decide on sheen along with color, because the finish matters as much as the shade. Flatter sheens hide wall imperfections and suit low-traffic bedrooms and ceilings, while washable satin or semi-gloss belongs in kitchens, bathrooms, hallways, and on trim and doors where you need to wipe things clean. Locking in both color and finish for each room before day one keeps the project moving without pauses.
Ventilation, dry times, and staying in the home
Most interior projects use low-odor, low-VOC products today, so staying in your home during the work is usually comfortable. Still, good airflow helps the paint cure and clears any smell faster. Opening windows where the weather allows and running fans keeps fresh air moving, though the crew will manage ventilation in the active work area as they go.
Dry time and recoat time are not the same thing, and rushing them is how finishes get ruined. Paint needs time to dry between coats, and Georgia humidity can stretch that out, especially in bathrooms, kitchens, and laundry rooms where moisture lingers. A good crew builds those dry times into the schedule rather than pushing a second coat on too soon, which is part of why the timeline is what it is.
Give the finish time before it goes back into service. Walls can be touched sooner, but it is worth waiting before leaning furniture against a freshly painted wall or hanging art back up, so the coat can harden fully. Ask the crew when it is safe to move furniture back, rehang items, and use the room normally, and follow that guidance so the finish you paid for stays flawless.
A simple pre-painting checklist
The night before, run through the short list: clear shelves, sills, mantels, and counters; take down wall art, mirrors, and photos; box up knickknacks, lamps, and small electronics; and move valuables and anything irreplaceable to a room that is not being painted. Strip beds and remove curtains or blinds if you can, and coil up loose cords.
Then handle the logistics: make a plan for pets and kids away from the work zone, clear a parking spot and a clear path in for the crew, decide how they will get in each day, and confirm your color and sheen choices for each room. If you have any drywall trouble spots, a stubborn stain, or a fixture you are worried about, write them down to point out on the first morning.
That is genuinely most of it. The painters handle moving and covering furniture, protecting floors, masking, patching, sanding, caulking, priming, and cleanup. Your part is clearing the personal and breakable items and sorting out the day-to-day logistics, and a quick walk-through with the crew on the first morning ties the two halves together. In the Marietta area, that short bit of prep is what turns an interior painting project into an easy, well-organized week.
Frequently asked questions
- What do I need to do before the painters arrive?
- Clear shelves, sills, and counters, take down wall art and mirrors, box up knickknacks and small electronics, and move valuables to a room that is not being painted. The crew handles moving and covering the large furniture, protecting the floors, and all the masking, so your part is mainly the small, personal, and breakable items plus a plan for pets, kids, and parking.
- Do painters move the furniture, or do I?
- A professional crew moves the large furniture for you, shifting sofas, beds, dressers, and tables to the center of the room or out of it, then wrapping and covering them. You do not need to haul heavy pieces before they arrive. It helps to point out anything delicate or anything that cannot be moved so they can protect it the way you want.
- Can I stay in my home while the interior is being painted?
- Usually yes. Most interior projects use low-odor, low-VOC products, so staying home is comfortable for most people. Good airflow helps the paint cure and clears any smell faster, and it helps to plan around not having full use of a kitchen or main bathroom for a day or two while it is being painted.
- What should I do with pets and kids during the project?
- Keep both away from the active work zone. Set pets up in a room that is not being painted, crate them away from the action, or arrange daycare on the busiest days, and let the crew know a pet is in the home so no one lets it out. Set up a play area for kids well away from wet paint, tools, and taped-down floor covering.
- Should I pick my paint colors before the crew arrives?
- Yes. Finalize your colors and sheens before day one so the project does not pause. Test large samples on the actual walls and look at them at different times of day, since lighting changes how a color reads. Choose the finish along with the color, using washable satin or semi-gloss for kitchens, baths, hallways, and trim, and flatter sheens for low-traffic bedrooms and ceilings.
Related services
Serving
Ready for an exact price?
Get a free, no-pressure in-home estimate. Real numbers for your home, not a phone guess.